SIEM and Endpoint Protection Setup
About Wazuh
For my SIEM and Endpoint Protection, I will be using Wazuh. Wazuh is an open source platform that provides threat detection, incident response, and compliance monitoring.
As a SIEM, Wazuh offers the following features:
- Centralized Log Management
- Compliance Auditing
- Real-time Threat Intelligence
- File Integrity Monitoring
These features will allow for me to keep this lab simplified and easy to manage.
Wazuh Manager Installation
For a simple deployment, I am using the pre-made OVA file that is available from Wazuh. The download for this OVA file can be found here. After properly importing it into VMWare, you can access the UI through a web browser using the default credentials. Make sure that the virtual machine is given a static/reserved IP.
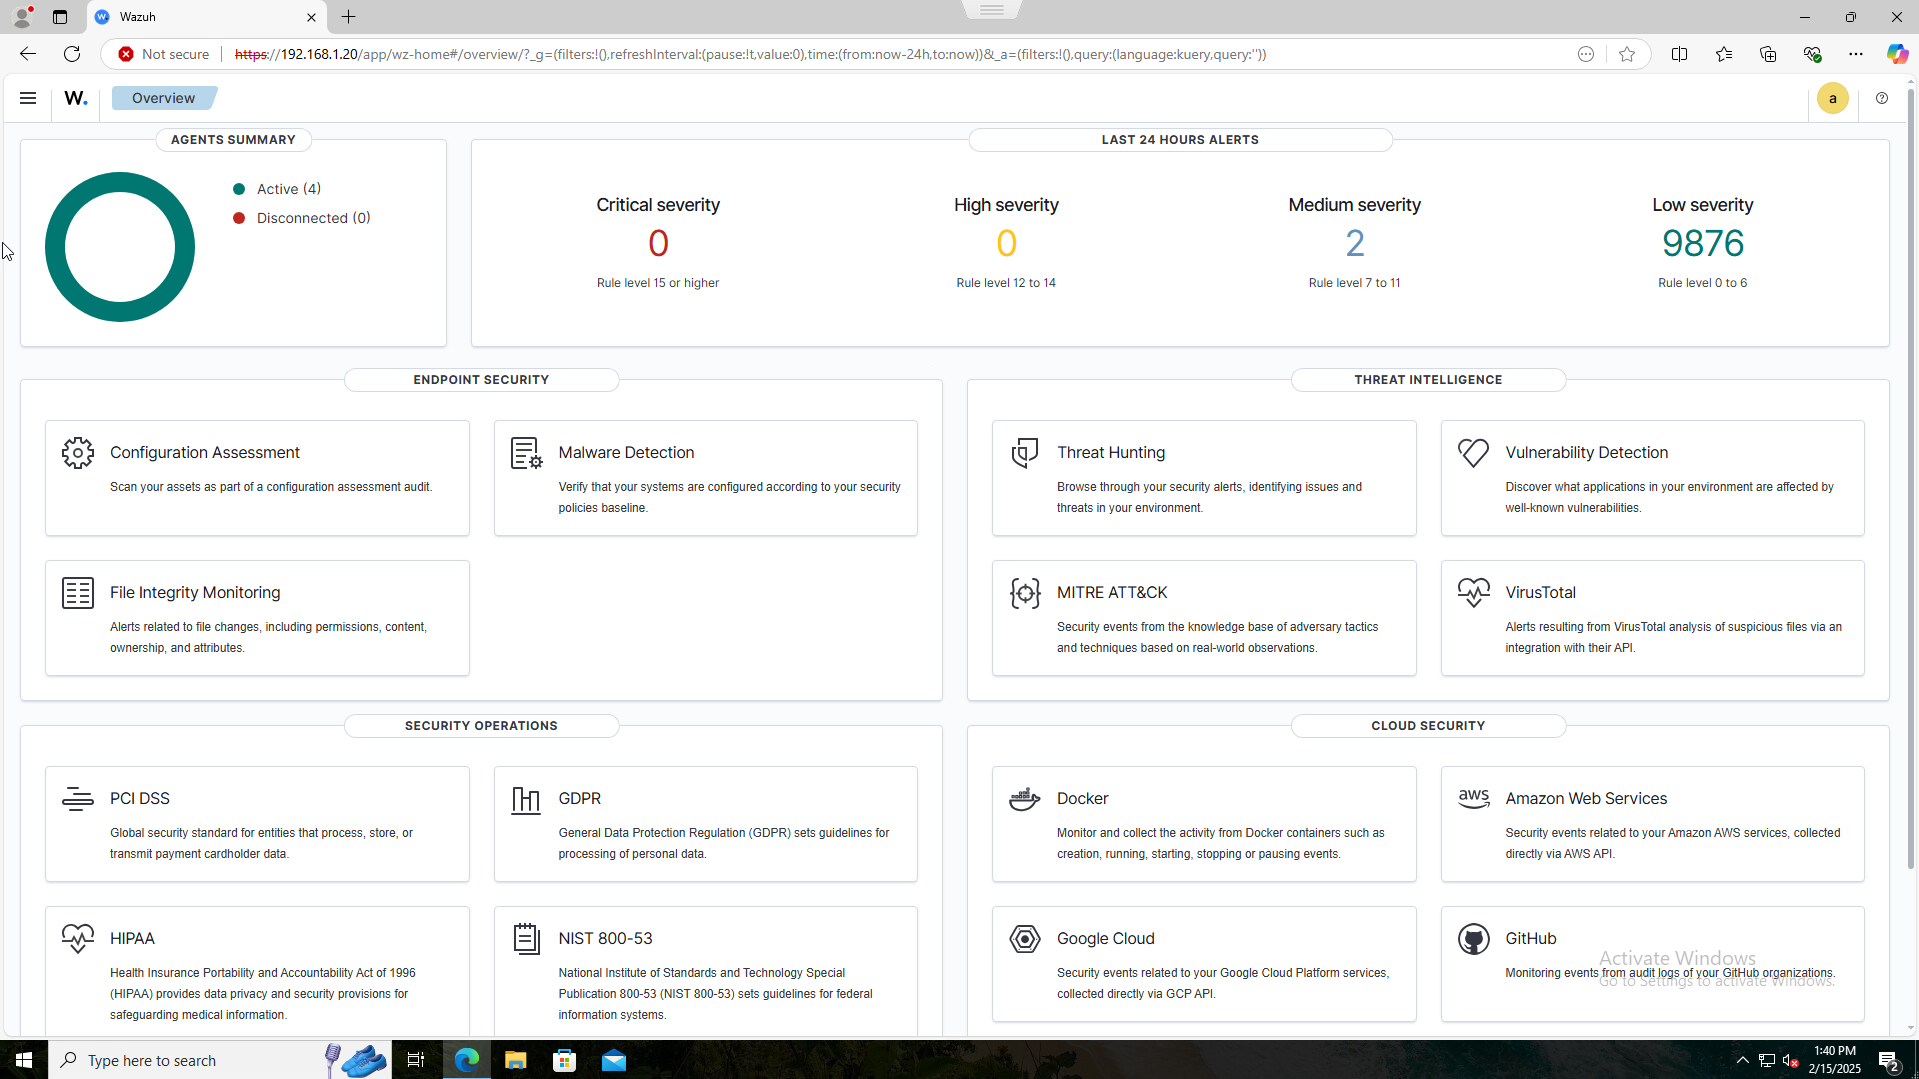
The Wazuh dashboard has various tools for endpoint security, threat intelligence, and security operations. I will go over these in future blog posts In addition to these tools, there is also an alerts monitor at the top that numbers the amount of alerts as well as their severity.
Wazuh Agent
The Wazuh agent is a software component that is installed on endpoints to collect security event data and send it to the Wazuh Manager for analysis. This allows for real-time monitoring, log collection, and response to security threats. The agent works by continuously monitoring systems and communicating with the manager to provide insights and alerts.
To add a new endpoint do the following:
-
Click on the Active section of the Agents Summary at the top left of the dashboard.
-
Click Deploy New Agent in the Agents box
-
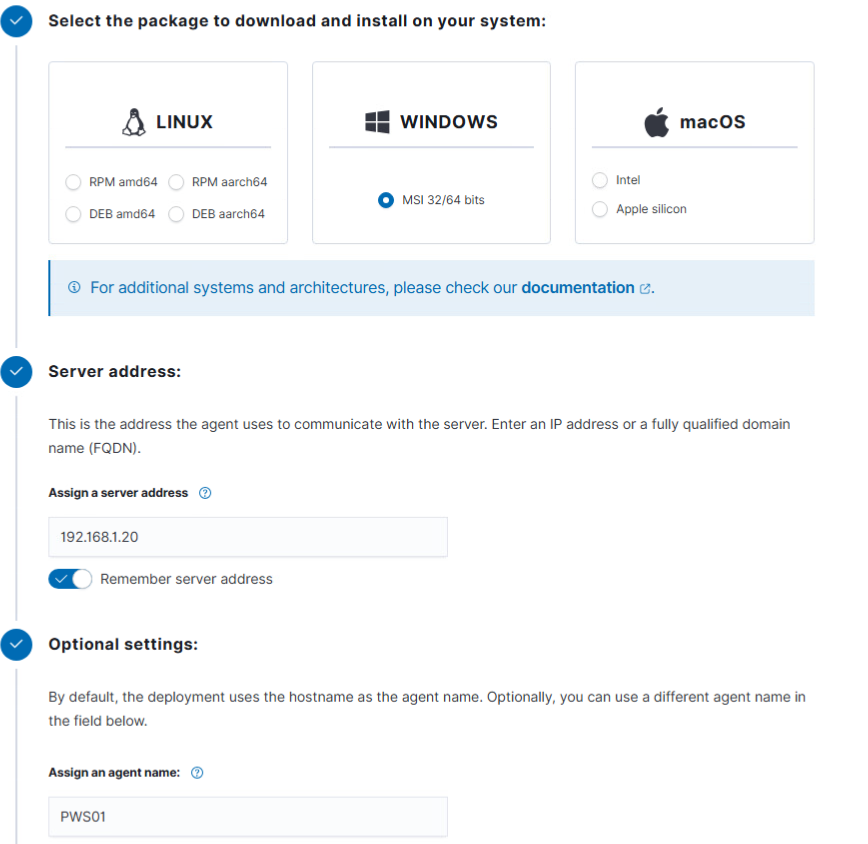
Go through the “wizard” to configure the endpoint. Make sure to choose the correct operating system and manager IP address.
Windows Installation
To install the manager on Windows machines, make sure that the Windows option is selected. This is important as you will use powershell to install the manager. After going through the wizard, you will get a PowerShell script that automatically installs the agent for you.
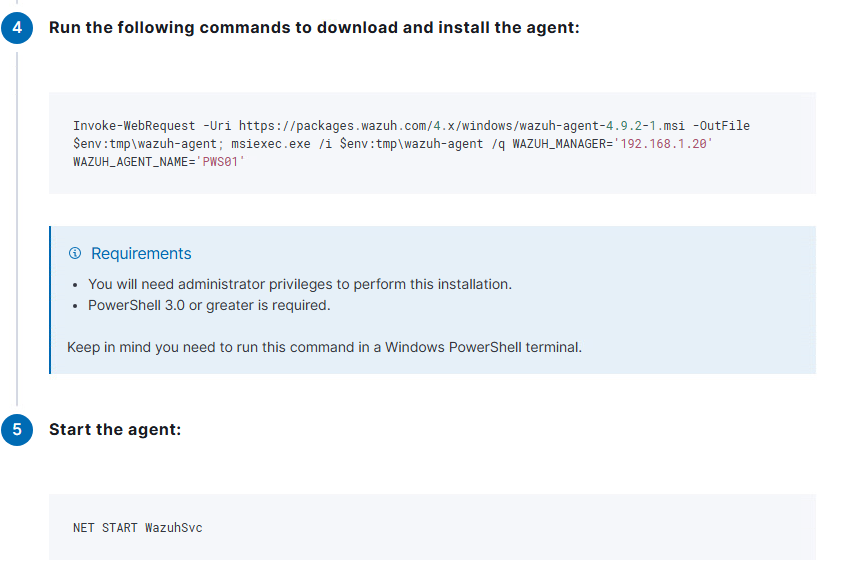
The script should look something like this
1
Invoke-WebRequest -Uri https://packages.wazuh.com/4.x/windows/wazuh-agent-4.9.2-1.msi -OutFile $env: tmp\wazuh-agent; msiexec.exe /i $env:tmp\wazuh-agent /q WAZUH_MANAGER='192.168.1.20' WAZUH_AGENT_NAME='PWS01'
Make sure to run this command after completing the installation
1
net start WazuhSvc
Linux Installation
The installation for a Linux machine is very similar. Going through the wizard is the same but you will get a linux command rather than powershell. I currently do not have any linux machines so I will not be adding any.
To start the agent, run the following commands
1
2
3
sudo systemctl daemon-reload
sudo systemctl enable wazuh-agent
sudo systemctl start wazuh-agent
Viewing Active Agents
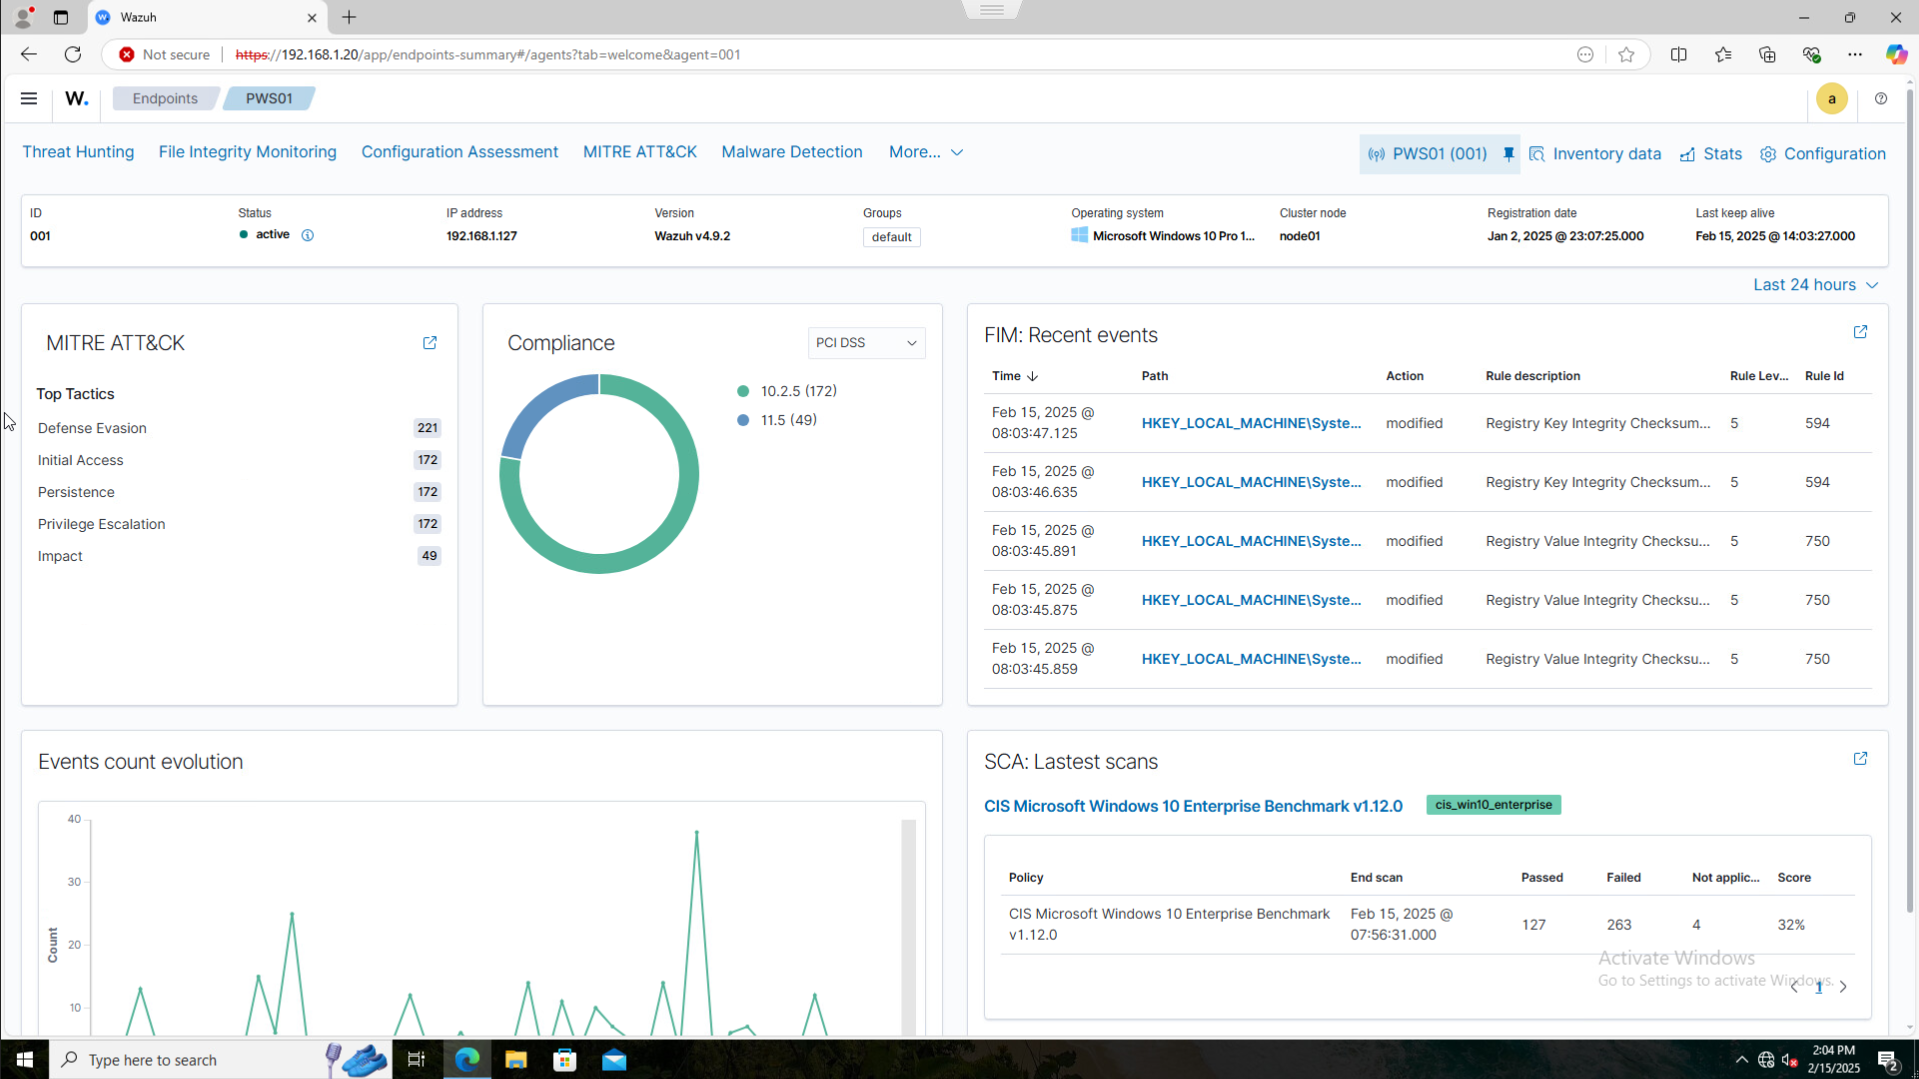
Once you have gone through the installation process, you should be able to see the agents now showing up as “Active” in the endpoints summary.
From here, you are able to click on individual endpoints to view a detailed summary of each device. For example, here you can see on PWS01, there are sections for compliance and recent events. You can also quickly move to malware detection, file integrity monitoring, and more. I will go into more detail when we move onto Security Operations for this lab.
Conclusion
By following these steps, Wazuh has successfully been installed and deployed. This setup will help me monitor events, analyze logs, and respond to threats efficiently. Additional configuration and monitoring will be done in the Security Operations post.
For more detailed configurations, refer to the Wazuh documentation.